
Adobe Lightroom offers two two approaches to uploading photos:
- Using the Export facility
- Using Publish Services (Lightroom 3 and above)
Below you will find step-by-step instructions for using both methods. Here I am going to use the Snapfish plug-in to illustrate the steps.
Exporting photos
The Export facility is pretty straightforward and it works similarly in all versions of Lightroom.
-
- Select the pictures you want to upload.
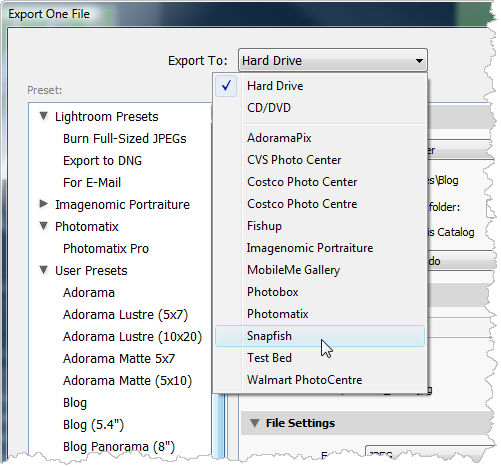
- Go to File | Export (or press Ctrl+Shift+E /Cmd+Shift+E ), and select the plug-in name from the Export To drop-down list. The control panel of the plug-in will appear in the main section of the Export window.
-
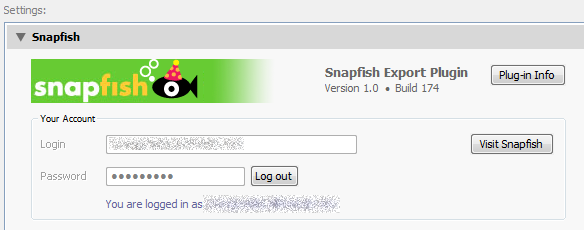
- In the Your Account section, enter your username and password, click Log in. If the online service accepts your credentials, a message "You are logged in as username" will appear at the bottom of the Your Account section.
-
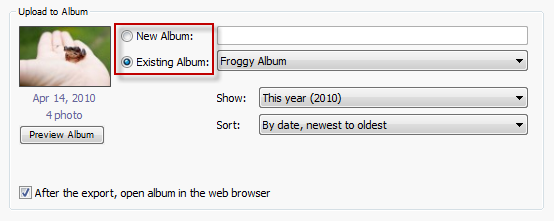
- In the Upload to Albumsection, specify the album to upload your photos to. You can do one of the following:
-
- Create a new album by clicking the New Album option and typing in a name for the new album.
- Select one of your existing albums by clicking the Existing Album option and choosing an album name from the drop-down list. Using the Show Albums and Sort Albums options, you can limit album choices and sort album names in the list, respectively.
-
- If you are uploading to an existing album, scroll down a little to the Export Options section and specify how to handle duplicate uploads. You can choose to upload new copies (even if that creates duplicate photos in the album), skip photos that already exist in the album, or replace older duplicates with new copies.
- In the Upload to Albumsection, specify the album to upload your photos to. You can do one of the following:

- Specify additional options, such as File Naming, File Settings, Image Sizing, etc - that is all Lightroom standard stuff, common for most export operations.
- Now click Export and wait for Lightroom to render and upload your photos. If you kept the After the export, open album in the web browser option checked, the web browser will start automatically and open your album page. Note, you might need to log in before you can actually access the album page.
Publishing photos
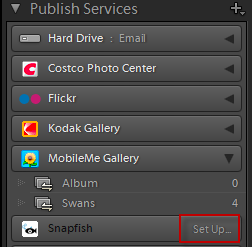
Starting with version 3, Lightroom offers a comprehensive approach to uploading your photos and keeping them organized as collections using Publish Services - see the Publish Services panel in the Library module.
- First you need to configure your publish service for the plug-in. From the user's standpoint, publish services work as export presets - each stores your user credentials for the online service, image settings, output sharpening, watermarking, etc. All publish collections (albums) created under a publish service share its settings.
- Go to the Library module and expand the Publish Services panel.
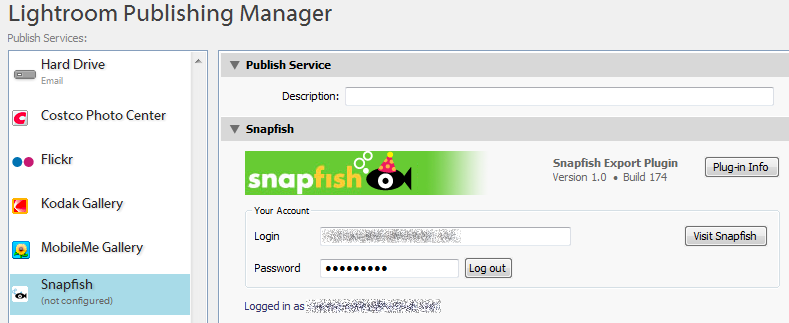
- Click Set Up...on the right side of the bar with with the name of the plug-in you are installing - again, we are using Snapfish as an example here.
- This will bring up the Publishing Manager with the plug-in's options section selected in the main panel. In the Your Account section, enter your username, password, then click Log into validate your credentials.
- Specify additional options, such as File Naming, File Settings, Image Sizing, etc.
- Click Save. Now you publish connection is ready for use. Should you need to use another account or different processing settings, you can create another publish connection as explained above. Just give it a descriptive name.
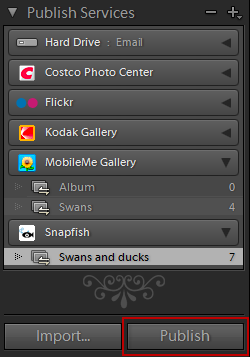
- Now you can create a new album in your publish service. By default, Lightroom will create a new album called "Album" for you, so you can just start dragging and dropping your photos in it - you can rename it later. Keep in mind that Lightroom treats albums like collections, so you can safely add and remove stuff without affecting physical files in your library.
- Make sure the album is names as you want it to appear in your online service. If you need to rename, just double-click the album name.
- When you are ready to publish your album, click Publish or right-click the album name and choose Publish Now from the pop-up menu. Alternatively, with the album name selected, click Publish on the bottom of the Publish Services panel.
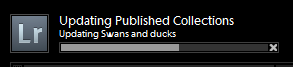
- Now Lightroom will start uploading your photos while displaying progress in the upper left corner of the screen.
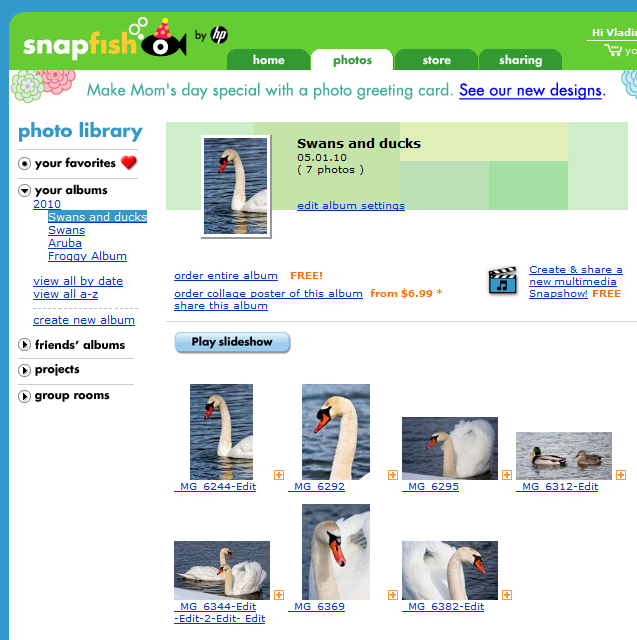
- When it is done, you can go to the online album you have created by right-clicking the album name and choosing Go to Albumfrom the pop-up menu. As you can see, the online album is pretty much a mirror image of the publish collection we have just created in Lightroom.
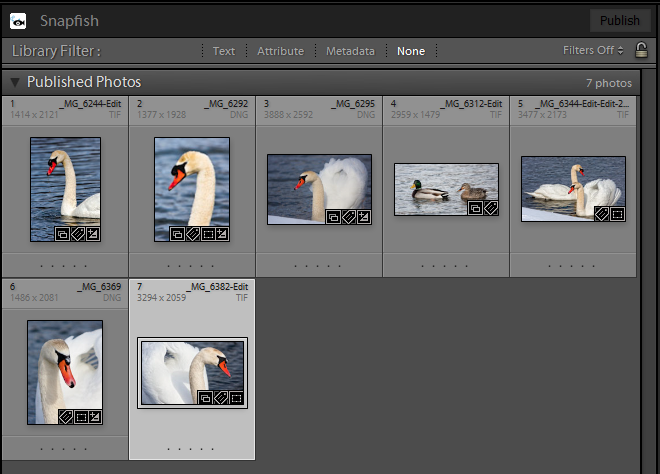
- You can even open online versions of your published photos, individually, by right-clicking a photo and choosing Go to Published Photo from the pop-up menu.
Of course, there is much more to Publish Services than I can cover in a short tutorial, but that can be learned from Lightroom documentation.