Lightroom Voyager
In order to use the plugin you should be in the Library module.
- Choose Library > Plug-in Extras > Lightroom Voyager > Migrate Published Collection from the Main Menu.
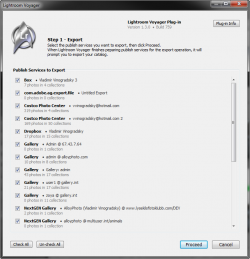
- The plug-in takes a few seconds to do a quick inventory of your publish services and published collections, then greets you with the Step 1 - Export dialog:
- The screen displays all available publish services in your catalog, each with a summary of contained collections and photos. Select the publish services you want to copy over. When you are finished making your selection, click Proceed.
- Lightroom Voyager goes through the publish services you have selected and prepares their collections and photos for the following export operation.
- When everything is ready, Lightroom Voyager displays the message:
At this point the plug-in has automatically selected all photos that need to be exported. For the sake of convenience, these photos were put in the Quick Collection. Make sure not to click any photos - all photos in the Quick Collection must remain selected, otherwise some of your photos will not be included on export.
- Click OK to close the message, then head to the main menu and choose File > Export as Catalog...
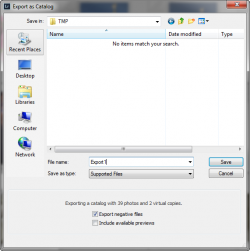
- Lightroom prompts you for a file name. Note, the catalog you create at this step is the intermediarey catalog used as a temporary storage for information about your publish services, collections, and photos. You will import data from this intermediary catalog at the next step.
Choose the destination folder and name to save your intermediary catalog. Also, depending on where you are planning to export and import your negative files, do one of the following:
- If moving to to another catalog on the same computer, keep the Export negative files option cleared because most likely you wouldn't need to create new copies of existing files.
- Select the Export negative files option if you are:
- transferring published collections to another computer
- transferring published collection from or to removable media
- transferring published collections to another catalog on the same computer, however want to have a complete isolation between the two catalogs, so that each has its own set of folders and files.
Here in my example, I am creating an intermediary catalog named "Export1" in N:\TMP with negative files included.
When the export operation is finished you can open the target catalog if it's on the same computer, or grab a copy of the intermediary catalog you have just created and head to the computer where you want it transferred. In this example I am going to transfer my publish services to a Mac computer.
Before you importing data make sure you have all the plugins that handle your publish services installed and enabled on the target computer. You do not need to configure publish services - Lightroom Voyager will configure them for you. Don't forget to install Lightroom Voyager as well.
- Open the target catalog and choose File > Import from Catalog... from the main menu.
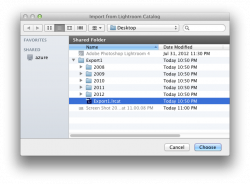
- Point Lightroom to the intermediary catalog and click Choose.
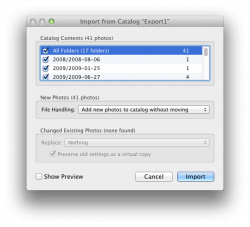
- Lightroom displays the Import from Catalog dialog. If you are transferring the catalog and photos to another computer, you should set the File Handling option to Copy new photos to a new location and import. Otherwise use the Add new photos to catalog without moving option. Click Import.
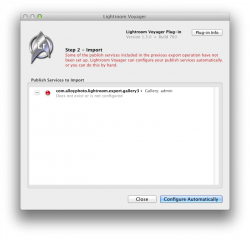
- Choose Library > Plug-in Extras > Lightroom Voyager > Migrate Published Collections from the main menu (you also must be in the Library module). Lightroom Voyager will display the Import Dialog:
As you can see, the publish service I am transferring hasn't been configured yet, so it has light next to it, meaning I have to to configure my publish services before doing the import. Starting with version 1.3.0, Lightroom Voyager can automatically apply the configuration settings of exported publish service. If for some reason you'd rather configured your publish services themselves, click Close and run the Migrate Published Collections action again when you are done. Otherwise, click Configure Automatically. Lightroom Voyager next would prompt you to quit and restart Lightroom:
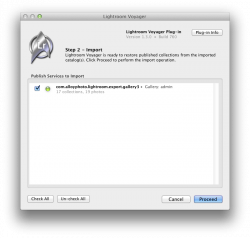
This is necessary to run a background task which updates the Lightroom catalog. You should quit Lightroom immediately, if you don't do so within 60 seconds the background task would abort and the catalog would remain unchanged. If you quit and start Lightroom as instructed, Lightroom Voyager would automatically open the Import dialog. This time the publish services should be properly configured, which would be indicated with green lights. If no red light remain then you are ready to run the import.
The summary next to each publish service displays the number of collections and photos included in the migration process and ready to be put back in place.
- Click Proceed and sit back, let Lightroom Voyager do its magic. If you have no smart published collections in the imported publish service, then Lightroom Voyager just displays a confirmation message when finished:
However, if you there are smart collections then another Lightroom restart would be required. The configuration dialog will appear as soon as you start Lightroom again.
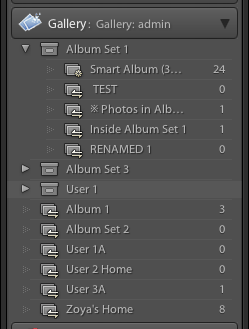
At this point all of your published collections should be re-created, populated with photos to match the original catalog, and linked with their online counterparts:
Bon Voyage!


